Creating a Chrome Extension Using React JS
Introduction
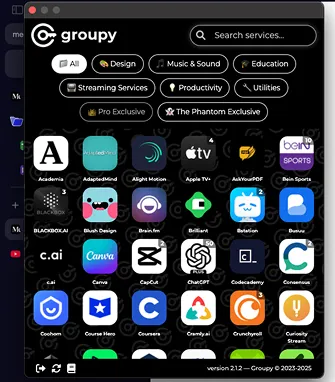
With the rapid advancement of technology and the widespread digital transformation, the reseller business has also grown rapidly. One of the most notable developments is the emergence of account resellers, which now offer various affordable bundled packages that are fully digitized. What was once managed manually—from account creation to customer service—is now fully integrated into an easy-to-access website. With automated payment systems, practical tutorials for accessing accounts, and monitorable usage history, everything has become more efficient and faster.
Not only that, the services offered include premium accounts such as Netflix, Canva, and ChatGPT, which you can enjoy for as little as 50,000 rupiah! Of course, this offer is very tempting for anyone who wants to enjoy premium services without having to spend a lot of money. With highly competitive prices, advanced technology and premium services are now accessible to everyone, without worrying about hefty costs. As a result, more people can experience the benefits of unlimited technology, all within a budget-friendly range!
Of all the features available, the main focus of this topic is on how to create an extension. Therefore, I am interested in trying to implement the extension using React JS.
Preparation:
pnpm create vite

Project name:
│  example-extension-chrome
│
◇  Select a framework:
│  React
│
◇  Select a variant:
│  TypeScript + SWC
│
◇  Scaffolding project in ./location-project/blablabla...
│
└  Done. Now run:

  cd example-extension-chrome
  pnpm install
  pnpm run dev
After installing React, continue by installing the necessary packages, namely:
pnpm add vite-plugin-static-copySteps to create a Chrome Extension
Create a manifest.json file in the public folder.
// if you want to know more about manifest.json, you can see here:
// https://developer.mozilla.org/en-US/docs/Mozilla/Add-ons/WebExtensions/manifest.json
{
    "manifest_version": 3,
    "name": "Stocks US",
    "version": "1.0.0",
    "description": "all data is example data for testing purposes",
    "action": {
      "default_popup": "index.html",
      "default_icon": "assets/icon16.png"
    },
    "permissions": [
      "storage",
      "activeTab"
    ],
    "icons": {
      "16": "assets/icon16.png",
      "48": "assets/icon48.png",
      "128": "assets/icon128.png"
    }
  }
In the vite.config file, add viteStaticCopy and target the manifest.json file that has been created.
import { defineConfig } from 'vite'
import react from '@vitejs/plugin-react-swc'
import { viteStaticCopy } from 'vite-plugin-static-copy';

// https://vite.dev/config/
export default defineConfig({
  plugins: [
    react(),
    viteStaticCopy({
      targets: [
        {
          src: 'public/manifest.json',
          dest: '.',
        }
      ],
    }),
  ],
  build: {
    outDir: 'build',
    rollupOptions: {
      input: {
        main: './index.html',
      },
    },
},
})
Add a simple UI in App, or you can skip it:
// bisa liat fullnya di repository yang telah saya cantumkan.

import { useEffect, useState } from 'react';
import ReactApexChart from 'react-apexcharts';
import { areaChartOptions } from './utils';

export interface StockData {
  date: string;
  open: number;
  high: number;
  low: number;
  close: number;
  volume: number;
  symbol: string;
}

const areaChartSeries = (stockData: StockData[]) => [{
  name: 'Price',
  data: stockData.map(data => data.close).reverse()
}];

function App() {
  const [stockData, setStockData] = useState<StockData[]>([]);
  const [selectedSymbol, setSelectedSymbol] = useState('AAPL');
  const [timePeriod, setTimePeriod] = useState('daily');

  const generateRandomStockData = (basePrice: number, days: number): StockData[] => {
    const data: StockData[] = [];
    let currentPrice = basePrice;
    const today = new Date();

    for (let i = days - 1; i >= 0; i--) {
      const date = new Date(today);
      date.setDate(date.getDate() - i);

      const changePercent = (Math.random() * 4 - 2) / 100;
      const priceChange = currentPrice * changePercent;
      currentPrice += priceChange;

      const dailyVolatility = currentPrice * 0.02;
      const high = currentPrice + Math.random() * dailyVolatility;
      const low = currentPrice - Math.random() * dailyVolatility;

      const volume = Math.floor(Math.random() * 900000) + 100000;

      data.push({
        date: date.toISOString().split('T')[0],
        open: currentPrice,
        high: high,
        low: low,
        close: currentPrice + (Math.random() * 2 - 1),
        volume: volume,
        symbol: selectedSymbol
      });
    }

    return data;
  };

  useEffect(() => {
    const days = timePeriod === 'daily' ? 7 : timePeriod === 'weekly' ? 30 : 90;
    const basePrice = selectedSymbol === 'AAPL' ? 150 : selectedSymbol === 'TSM' ? 100 : 200;
    const data = generateRandomStockData(basePrice, days);
    setStockData(data);
  }, [selectedSymbol, timePeriod]);

  const latestData = stockData[stockData.length - 1] || {
    open: 0,
    close: 0,
    high: 0,
    low: 0,
    volume: 0,
    date: new Date().toISOString().split('T')[0]
  };

  return (
    <div className="min-h-screen">
      <header className="my-6 px-5 grid grid-cols-2 items-center text-white">
        <h1 className="text-xl font-bold">Stocks US</h1>
        <select
          className="w-full px-4 py-2 border rounded-lg appearance-none pr-10 arrow-down text-sm"
          value={selectedSymbol}
          onChange={(e) => setSelectedSymbol(e.target.value)}
        >
          <option value="AAPL">AAPL</option>
          <option value="TSM">TSM</option>
          <option value="NVDA">NVDA</option>
        </select>
      </header>

      <main className='mb-10'>
        <div className="px-5 mt-10">
          <p className="text-3xl font-semibold text-white">${latestData.close.toFixed(2)}</p>
          <p className="text-xl font-semibold text-white">{selectedSymbol}</p>
        </div>
        <ReactApexChart
          options={areaChartOptions(stockData)}
          series={areaChartSeries(stockData)}
          className="p-0 mt-9"
          type="area"
          height={200}
        />
        <div className='mx-5 my-10 flex justify-center items-center bg-gray-500/90 rounded-full overflow-hidden border-2 border-gray-800'>
          <button
            className={`${timePeriod === 'daily' ? 'bg-gray-900/90' : 'bg-gray-800'} py-2 text-white w-full`}
            onClick={() => setTimePeriod('daily')}
          >
            <p className='text-white text-sm'>Daily</p>
          </button>
          <button
            className={`${timePeriod === 'weekly' ? 'bg-gray-900/90' : 'bg-gray-800'} py-2 text-white w-full`}
            onClick={() => setTimePeriod('weekly')}
          >
            <p className='text-white text-sm'>Weekly</p>
          </button>
          <button
            className={`${timePeriod === 'monthly' ? 'bg-gray-900/90' : 'bg-gray-800'} py-2 text-white w-full`}
            onClick={() => setTimePeriod('monthly')}
          >
            <p className='text-white text-sm'>Monthly</p>
          </button>
        </div>
        <div className="rounded-lg px-5">
          <div className="grid grid-cols-3 gap-4">
            <div>
              <p className="font-semibold text-white">Open</p>
              <p className="font-light font-sm text-white">${latestData.open.toFixed(2)}</p>
            </div>
            <div>
              <p className="font-semibold text-white">Close</p>
              <p className="font-light font-sm text-white">${latestData.close.toFixed(2)}</p>
            </div>
            <div>
              <p className="font-semibold text-white">High</p>
              <p className="font-light font-sm text-white">${latestData.high.toFixed(2)}</p>
            </div>
            <div>
              <p className="font-semibold text-white">Low</p>
              <p className="font-light font-sm text-white">${latestData.low.toFixed(2)}</p>
            </div>
            <div>
              <p className="font-semibold text-white">Volume</p>
              <p className="font-light font-sm text-white">{latestData.volume.toLocaleString()}</p>
            </div>
            <div>
              <p className="font-semibold text-white">Last Update</p>
              <p className="font-light font-sm text-white">{latestData.date}</p>
            </div>
          </div>
        </div>
      </main>
    </div>
  )
}

export default App
The next step is to build the react app, and then continue to apply it in the chrome extension *can be seen in the image below:
pnpm build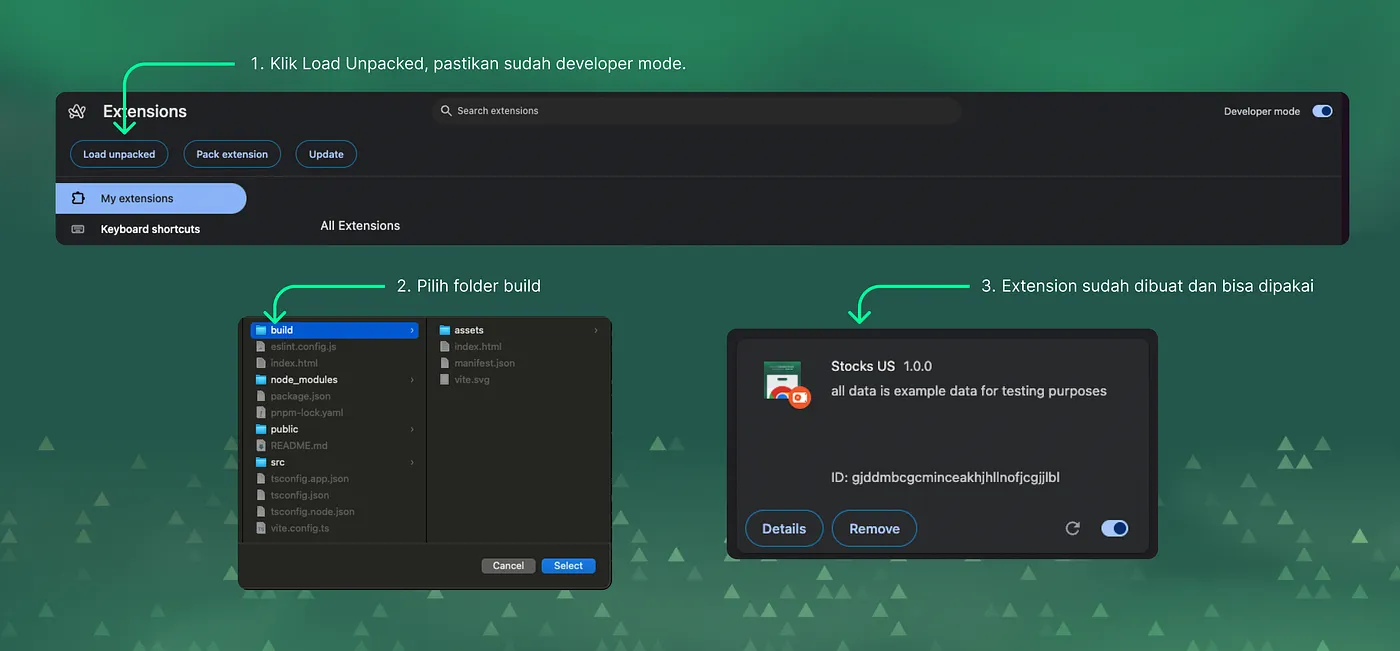
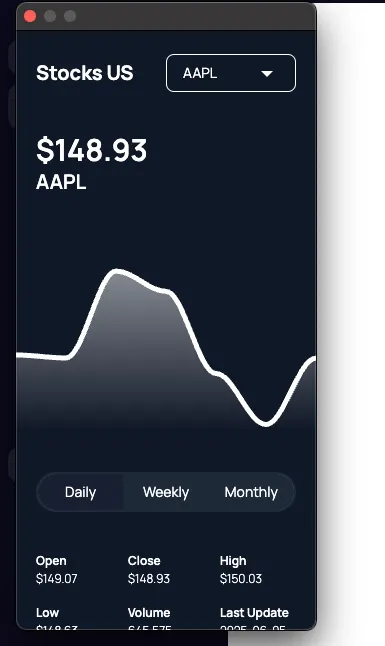
The result will be like this:
Conclusion:
The development of digital technology has brought many conveniences, including in the premium account reseller business such as Netflix, Canva, and ChatGPT. All processes can now be done automatically and digitized, so access to premium services becomes more efficient, practical, and affordable for everyone.
Through this article, you have learned the basic steps in creating a Chrome extension using React JS. Starting from installing React with Vite, creating a manifest.json, to the build process and implementation of the extension in Chrome.
With this, you have explored the basic steps in creating a Chrome extension using React JS. Hopefully, you can develop your own digital solutions to support your business or personal needs. I hope this guide is useful and can inspire you to continue experimenting with the latest technologies!
Source:
If you don't see any comment section, please turn off your adblocker :)